How to Check & Change Your Brake Fluid
Ever popped your hood and thought, “What’s that weird-looking liquid?” That’s brake fluid—and it’s way more important than it looks. It’s the unsung hero keeping your brakes from turning into “emergency slide” mode. But here’s the thing: Brake fluid doesn’t last forever. It soaks up moisture, gets dirty, and turns into a braking system kryptonite. So whether you’re a DIY guru or just want to sound like one at parties, here’s how to check, flush, and replace it like a pro—without breaking a sweat (or your wallet).
Step 1: Find the Brake Fluid Reservoir

First off, locate the star of the show: the brake fluid reservoir. It’s usually chilling under your hood, looking like a small plastic jug with a cap labeled “Brake Fluid.” Think of it as the brain of your braking system—this is where the magic (and the fluid) lives. Can’t spot it? Look near the back of the engine bay, close to the firewall. Hint: It’s not the wiper fluid jug (that one’s blue). Brake fluid’s usually clear or amber, and the cap might have a warning label like “Do Not Open” (don’t worry—we’ll handle that part).
Step 2: Check the Level
Pop the reservoir cap (gently—no need to yank it like you’re opening a beer). Inside, you’ll see two lines: LOW (L) and FULL (F). Your goal? Keep the fluid between ’em. If it’s hovering in the middle, congrats—you’re good for now. If it’s edging toward LOW? Not panic mode yet. Brake pads wear down over time, and when they do, the caliper pistons push out extra fluid to keep the brakes tight. It’s like your car’s way of saying, “Hey, I need new pads soon!” But if it’s below LOW? That’s a heads-up. Brake systems are closed loops—they shouldn’t lose fluid unless something’s leaking.
Step 3: Decode the Fluid Color
Brake fluid isn’t supposed to look like coffee with creamer. Fresh fluid’s clear or pale amber. If it’s dark brown or black? That’s old, contaminated fluid—like leftover pizza sauce in your fridge. Dark fluid means moisture has snuck in (remember, brake fluid’s “hygroscopic”—it sucks up water like a sponge). Moisture lowers the boiling point, which means your brakes could “fade” (turn soft) when you need ’em most. If it’s murky or smells burnt? Time for a brake fluid flush. Think of it like hitting the reset button on your braking system.
Step 4: Hunt for Leaks
If the fluid’s low and the reservoir’s emptying fast, grab a flashlight and check the hoses, lines, and connections. Look for drips, puddles, or wet spots under the car. Brake fluid’s slippery, so it’ll leave a shiny trail. Common leak spots? The master cylinder (near the reservoir), brake calipers (at the wheels), or wheel cylinders (if you’ve got drums). If you spot a leak, don’t drive the car—call a mechanic. Leaks mean your brakes are compromised, and “compromised” is not a word you want paired with “brakes.”
How to Change Your Brake Fluid
Alright, let’s say you’re ready to level up—time for a brake fluid flush. Here’s the play-by-play:
Step 1: Jack Up the Car & Get Cozy

First, lift your ride and pop it on jack stands. Yeah, you could do this with wheels on, but why make it harder? Plus, you’ll need space to reach the bleed screws—think of it like giving yourself a little workspace spa day. Pro tip: Do this on a flat surface, and double-check the car’s stable before crawling underneath.
Step 2: Drain the Old Fluid from the Master Cylinder
Grab a turkey baster (yes, the one you use for stuffing turkeys—life’s full of weird reuse). Suck out most of the old fluid from the master cylinder. Why? Because if you don’t, when you start bleeding the brakes, it’ll overflow—like overfilling a water balloon, but way messier. Leave just enough to keep the system from sucking air.
Step 3: Bleed the Brakes—One Wheel at a Time
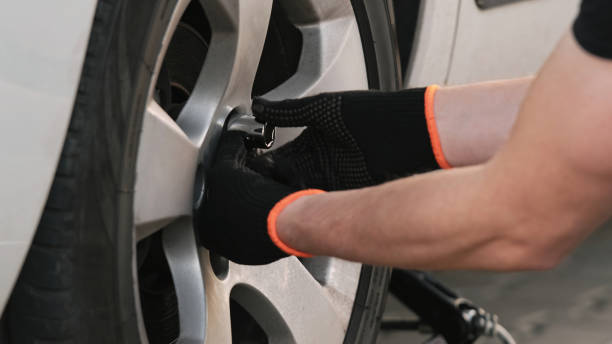
Start with the wheel farthest from the master cylinder—usually the rear passenger side. Why? Because brake fluid flows front-to-back, and you want to flush the old stuff out completely. Remove the wheel, find the bleed screw on the caliper (or wheel cylinder for drum brakes), and attach a clear rubber hose to it. Stick the other end of the hose in a container (catches the old fluid).
Now, have a buddy slowly pump the brake pedal—like they’re testing how squishy it is. When it hits the floor, loosen the bleed screw a tad. You’ll see dark, gunky fluid (and maybe air bubbles) come out. Tighten the screw once the flow slows, then have them pump again. Repeat until the fluid runs clear. Do this for every wheel, in order, and keep topping off the master cylinder so it never runs dry.
Step 4: Add Fresh Fluid & Call It a Day
Once all wheels are bled, pour fresh brake fluid (check your owner’s manual for the right type—DOT 3, 4, or 5.1) into the reservoir, up to the FULL line. Don’t mix fluids—stick to one type. And don’t overfill—overfilling causes foaming, which is bad news.
Why Bother? Brake Fluid Change Saves Your Butt
Here’s the kicker: Neglecting brake fluid is like ignoring a check engine light—you’re asking for trouble. Old fluid leads to soft brakes, longer stops, and in the worst case, total brake failure. A brake fluid change costs between 130 (way cheaper than a new car or a hospital bill). And a brake fluid flush? It’s like a deep clean for your braking system—removes all the gunk, extends pad life, and keeps you safe.
So next time you’re under the hood, don’t just glance at the reservoir—check it. And when it’s time for a flush? Don’t procrastinate. Your brakes work hard—show ’em some love.

